Adding Purchase Order Numbers and Descriptions
2 minute read
You can add purchase order (PO) numbers and descriptions to the Connector. This facilitates users selecting the correct number when sending out content for translation. Users can still manually enter any PO number that is not already in the system.
To add a purchase order number:
-
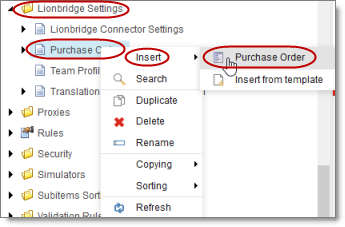
In the Content Editor, in the content tree, navigate to /sitecore/system/Settings/Lionbridge Settings/Purchase Orders/.
-
Click the Purchase Orders item to select it.
Right-click and select Insert > Purchase Order from the context menu that opens.
The Message dialog box opens.

- Enter the purchase order number and click OK. For example, enter 12345.
A new child item is created for the purchase order you just created.
This purchase order number will be available for selection when users send out content for translation.
- Optional. You can enter a description for the purchase order number you just created. This description will be displayed beside the purchase order number when it is available for selection.
a. In the content tree, navigate to the purchase order you just created, and select it.

b. In the content area, scroll down to the Information section and expand it.
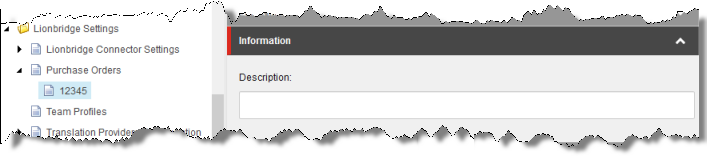
c. In the Information section, in the Description field, enter the description of the purchase order.
d. Click the Save button ![]() in the top-left corner to save your changes.
in the top-left corner to save your changes.