Sending Products for Translation from the Hybris Backoffice Products Page
5 minute read
You use the Connector to send out configured localized attributes of products for translation from the Backoffice Products page.
Note: You configure which localized attributes of products you can send out for translation in the Content Mapping page. For detailed instructions, refer to the Lionbridge Connector for SAP Commerce Installation and Configuration Guide.
To send out the localized attributes of business objects for translation from the Backoffice Products page:
- In your Web browser, navigate to /backoffice/ on your Hybris instance.
- Log in to the Hybris Backoffice.
- Ensure that the Administration menu is selected.
- In the navigation tree on the left, navigate to Catalog > Products.
The Products page opens.

- Locate the products to send out for translation. You can view the products in the List View
 , Tree View
  , or the Grid View
  mode.
mode.
Tip: You can use the search and advanced search functionality to display only the products to send out for translation.
- Select the products to translate:
-
In the List view
 , click a checkmark
  in the left column to select it and the corresponding page.
 -
In the Tree view
 , select a check box to select the corresponding page.
 -
In the Grid view
 , select a a checkmark
  in the left column to select it and the corresponding page.
Tips: To select a range of adjacent products, press the Shift key. To select multiple non-adjacent products, press the Ctrl key. Before selecting products, ensure that the lock icon ![]() is displayed in the top-right corner. If the unlock icon
is displayed in the top-right corner. If the unlock icon ![]() is displayed, click it to toggle it to the lock icon.
is displayed, click it to toggle it to the lock icon.
- In the toolbar, click the Send selection to translation button
 .
.
The Job Type page of the Send to translation wizard opens.
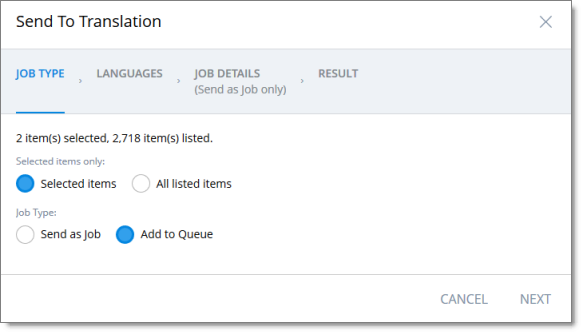
This page displays the number of items selected and the number of items available for selection.
- In the Job Type page, you specify the following settings:
- which items the Connector will send for translation. Select one of the following radio buttons:
- Selected items: These are the items you selected in step 6, above.
- All listed items: All the items that were availabe for selection, after the filtering in step 4, above.
- how the Connector will process the items to send for translation. Select one of the following radio buttons:
- Send as Job: The Connector will send out the items for translation as a single job. The Connector will send the job to the Lionbridge Connector API Platform, which will send it to the translation provider that you will specify later in this wizard.
- Add to Queue (the default selection): The Connector will send the items to the Translation Queue, where a user must send them out for translation.
When you are done, click Next.
The Languages page of the wizard opens.
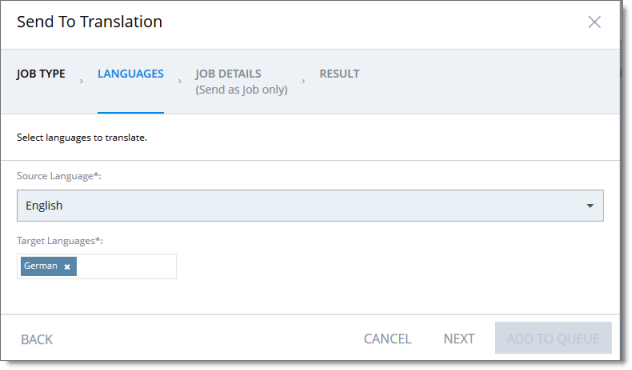
- In the Languages page, you specify the following settings:
- Source Language: Select the source language of the items from the dropdown list. The Connector will send items in this source language for translation.
Note: All selected items must have the same source language.
- Target Languages: Select one or more target languages, into which to translate the items. The list displays all the languages that are set up for the Connector.
When you are done, do one of the following:
- If you selected Add to Queue in the Job Type page of the wizard, click Add to Queue.
Note: The Add to Queue button is available only if you selected Add to Queue in the Job Type page of the wizard.
The Result page of the wizard opens, displaying the number of items that the Connector sent to the Translation Queue.
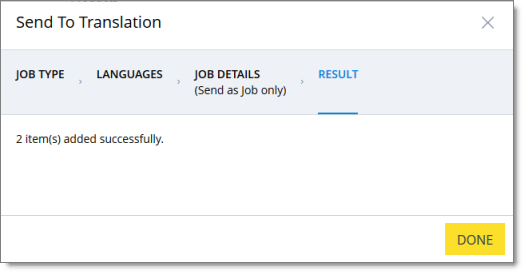
Click Done to close the wizard.
Important: You must open the Translation Queue to send out these items for translation. For detailed instructions, see Sending Items for Translation from the Translation Queue.
- If you selected Send as job in the Job Type page of the wizard, click Next.
Note: The Next button is displayed only if you selected Send as job in the Job Type page of the wizard.
- If you clicked Next, the Job Details page of the wizard opens.
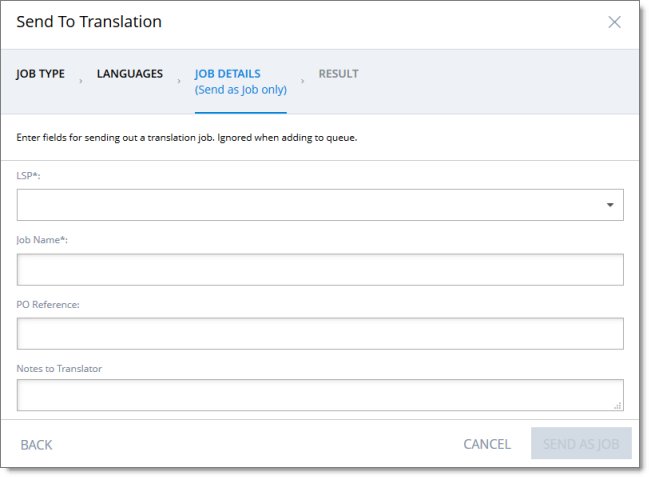
In the page you specify the following job settings:
Note: You specify job settings for the items you sent to the Translation Queue when you send them out for translation from the queue, as described in Sending Items for Translation from the Translation Queue.
| Field | Description |
|---|---|
| LSP | Select the translation provider for this translation job from the list. |
| Job Name | Your name for this translation job. A translation job contains all the items that the Connector sends out together for translation. |
| PO Reference | The purchase order reference number. |
| Notes to Translator | Any special instructions or requests. Note: Displayed only when any translation provider other than Lionbridge Freeway is selected in the LSP field, above. |
| Special Instructions | Any special instructions or requests. Note: Displayed only when the Lionbridge Freeway translation provider is selected in the LSP field, above. |
| Analysis Codes | You can specify the configured Lionbridge Freeway analysis codes for the translation job. Note: Displayed only when the Lionbridge Freeway translation provider is selected in the LSP field, above. |
When you are done, click Send as Job.
The Results page of the wizard opens, displaying the number of products the Connector sent for translation.
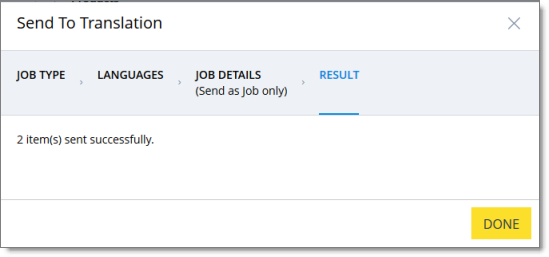
- Click Done to close the wizard.
Tip: You can monitor the progress of your job on the Translation Jobs page. For details, see Monitoring Translation Status.