Adding Categories of Products to the Job
2 minute read
When you create a translation job, as described on Creating a Translation Job, you can add products to it by category.
To add categories of products to a job you are creating:
- Click the Category tab.
The Categories selected for job page opens.
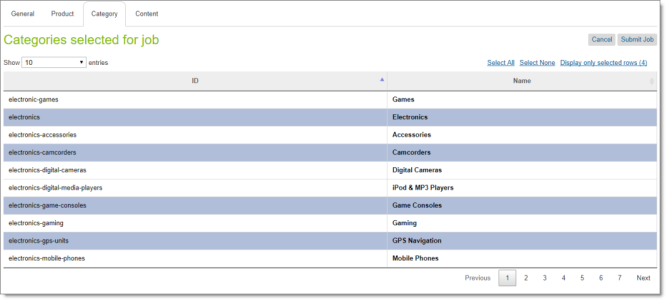
This page displays the following information about each product in the selected catalog:
- ID: The category ID in Salesforce Commerce Cloud.
- Name: The name of the category in Salesforce Commerce Cloud.
Tips: In the Show dropdown list, you can select how many categories to display in this sub-page of the list. By default, 10 categories are displayed. You can change this to 25, 50, or 100. You can navigate to other sub-pages using the number buttons below the list, on the right side.
- Do one or more of the following to select the products to send for translation:
- Click one or more rows to select the corresponding categories.
- Click the Select All link to select all rows.
- Click the Select None link to clear the selected rows.
- Click the Display only selected rows link to display only the rows you selected. (Link is displayed only when all rows are displayed.)
Note: The text in this link displays the number of selected rows.
- Click the Show All link to display all rows in the list. (Link is displayed when only the selected rows are displayed.)
To locate the items to select, in the Search box, you can enter a string and either click the search icon ![]() or press Enter. The list displays only categories that match this string.
or press Enter. The list displays only categories that match this string.
- When you are done, do one of the following:
- To add products from a catalog or all products in a catalog to the job, click the Product tab. For details, see Adding Products and Catalogs to the Job.
- To add static website content to the job, click the Content tab. For details, see Adding Static Website Content to the Job.
- If you are finished adding content items for translation, click Submit Job. For details, see Reviewing and Submitting a Job.
The Job Summary - Items selected for translation dialog box opens. For details, see Reviewing and Submitting a Job.