less than a minute
This section describes how to install the Cartridge installation package you downloaded earlier into your Salesforce Commerce Cloud system.
Before you install the Cartridge, verify that you have reviewed the system requirements and followed all the pre-installation procedures described in Before You Install.
To install the Cartridge:
-
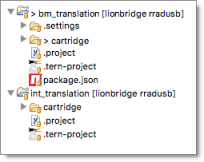
Unzip the Cartridge installation package, which includes the int_lionbridge and bm_lionbridge cartridges.
-
In the UX Studio plugin, select File > New > Cartridge to import the int_lionbridge and bm_lionbridge cartridges. For details, refer to the Salesforce Commerce Cloud Infocenter, at https://www.salesforce.com/products/commerce-cloud/overview/ (login required).
-
In each of the two cartridges you just installed, open the
Translation.jsfile for editing, and replace app_storefront_controllers with the name of your cartridge containing the referenced scripts. -
Activate the Storefront Cartridge. For each storefront from which you want to translate data, add
int_lionbridgeto the cartridge’s path.

- Activate the BM Cartridge. Add bm_lionbridge to the cartridges path of the Business Manager Site.
