8 minute read
You send out assets for translation from the New Translation page after you collect them, as described in Collecting Assets for Translation.
When the App sends out assets for translation, it creates placeholder assets for the content of the language versions of the specified target languages.
Note: If you accidentally delete the placeholder assets, the App still replaces them with the translated assets, once they are available. However, the asset IDs will be different.
When you send out assets for translation, you can either:
- send them out immediately for translation as a single job
- add them to the Translation Queue, so that you can group them into jobs and send them out later
Note: Assets in the Translation Queue are actually just pointers to the assets in Eloqua. If you modify an asset within Eloqua after adding it to the queue, those changes are included in the version sent out for translation.
To send out assets for translation:
-
Open the Lionbridge App. For detailed instructions, see Getting Started with the Lionbridge App for Oracle Eloqua.
-
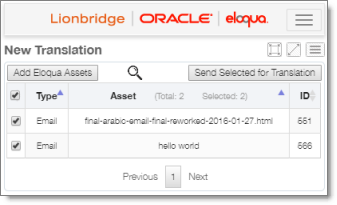
In the App, ensure that the New Translation page is open. This is the default selection when you open the App. For a detailed description of this page and its maximized version, see Viewing Collected Assets.
-
If immediately previously you collected assets for translation, the corresponding check boxes are already selected. You can clear these check boxes or select additional check boxes.
-
Select the check boxes of the assets to send out for translation. If you later choose to send out these assets for translation immediately, then the App will send out these assets together as a single translation job.
The assets you select should have the following in common:
- They are in the same source language.
- You want to translate them into the same target languages.
In addition, if you want to immediately send out the assets you select for translation, they should have the following in common:
- You want to send them to the same translation provider.
- You want to apply the same translation settings to them (described in step 7, below) and you want them to be part of the same translation job.
- Click Send Selected for Translation.
Notes: This button is available only when all the selected assets are in the same source language. This button is also available on the maximized version of this page.
The New Translation dialog box opens, displaying the Languages tab.
- As displayed when the dialog box is opened from the New Translation page in the My Eloqua dashboard:
![]()
- As displayed when the dialog box is opened from the maximized version of the New Translation page:
![]()
- Enter the following preliminary information about your translation job:
| Field | Description |
|---|---|
| Provider | Select the translation provider for this translation job. The dropdown list displays all translation providers configured for your site. Tip: If multiple translation providers are available, click the Save selected button Note: If you add the assets to the queue instead of immediately out for translation, you can change the translation provider later. The selected translation provider determines which source and target languages are available for selection below. This prevents you from selecting languages that are not supported for a particular translation provider. |
| Special Instruction | Any additional instructions for Lionbridge Freeway. Displayed only if the provider selected in the Provider box, above is the Lionbridge Freeway Type. |
| Analysis codes | The Freeway analysis codes for the translation. Displayed only if: * In the **Provider** box, above, the provider selected is the Lionbridge Freeway Type. * The App is configured to display these fields. You specify the analysis codes that are relevant to your content. Your Lionbridge setup determines which analysis codes are available for you to specify, and the values available for selection for each analysis code. For example, the Region, Department, and Priority analysis codes may be available for you to specify. |
| Source Language | Select the source language of the selected assets. The Lionbridge App will send assets in this source language for translation. The dropdown list displays all the source languages that your teams are allowed to send out for translation. Tip: If multiple source languages are available, click the Save selected button Note: Languages are available for selection only if they are supported for the translation provider selected in the Provider field, above. |
| Target Languages | Select the check boxes for all the target languages into which to translate the selected assets. The list displays all the target languages for which your teams are allowed to request translation. Tips: To select the check boxes of all available target languages, click the Select All button. To clear all selected check boxes of target languages, click the Clear button. Note: Languages are available for selection only if they are supported for the translation provider selected in the Provider field, above and for the selected source language, above. |
- Optional. This step is required only if you will click the Send for Translation button at the bottom of the dialog box to send out the assets directly for translation. Click the Translation Job tab to display it.
![]()
If you opened this dialog box from the maximized version of this page, the tab is displayed as follows:
![]()
Note: Enter information in this tab only if you are sending out these assets for translation immediately as a single job, by clicking the Send for Translation button below. If you add these assets to the Translation Queue, you add the job information later, when you send out the assets for translation from the queue. If you add these assets to the Translation Queue, the Lionbridge App ignores any information in this tab.
Enter the following information about this translation job:
| Field | Description |
|---|---|
| Job Name | Your name for this translation job. The Lionbridge App sends this information to your translation provider. |
| Job Description | Your description of this translation job, including any special instructions or requests. The Lionbridge App sends this information to your translation provider. Note: This field will not be displayed if the Lionbridge App is configured to hide it. |
| PO Reference | Optional. The purchase order reference number, if relevant. Note: Depending on your company’s configuration, this field may have another name, and it may be either a freeform text field or a dropdown list with pre-configured entries available for selection. |
| Quote – Send for quote first | Select this check box to inform the translation provider that you want to receive a quote before the translation process starts. |
| LocalTM – Use LocalTM | Select this check box to check whether content was already translated before sending it out for translation. The Lionbridge App sends out only changed content for translation. If content was previously translated and it has not changed, then the Lionbridge App does not send it for translation again: Instead, it uses the stored translation. This feature reduces the quantity of content that the Lionbridge App sends to translation providers, which reduces your cost. However, it increases the processing time before sending out the content for translation. |
| Due Date | The requested translation deadline. This is the date when you expect the translated content to return. By default, it is two weeks from the current date. To select a different date, either type the delivery date in the field in MM/DD/YYYY format, or click in the field and select a different date in the calendar that opens. This information is sent to the translation provider as metadata of the translation package. Note: Depending on your company’s configuration, this field may not be displayed. |
| Team | If you are a member of multiple teams, select your team to use for this job. Note: Your team determines which source and target languages are available for selection in the Languages tab, described in the previous step, and the available translation providers, described below. Tip: If multiple teams are available, click the Save selected button |
| Notification | Select one of the following to specify which email addresses will receive notifications about this job: * All Users of Selected Team: The email addresses of all the users in the team specified above. This is the default selection. * Just Job Submitter: Your email address. * Specific Email Addresses: The email addresses specified in the Emails box, below. * an email notification group. For more information, refer to the Lionbridge App for Oracle Eloqua Setup Guide. **Tip:** Click the Save selected button |
| Emails | The list of email addresses that will receive email notifications about this job. The selection in the Notification dropdown list, above, determines default list of email addresses. You can edit this list by adding, editing, and deleting email addresses. Each email address must be on a separate line. Tip: To save the list of email addresses as a new or updated group, click the Save as a new notification group button |
- Do one of the following:
- Click Add to Queue to add the selected assets to the Translation Queue.
You or another user on your team must send it out these assets for translation from the Translation Queue. For details, see Sending Assets for Translation from the Translation Queue.
- Click Send for Translation to immediately send out the translation job to the specified translation provider.
You can monitor the job’s status on the Translation Jobs page. For details, see Monitoring Translation Jobs.