Configuring the User Interface
2 minute read
In the UI tab of the Site Configuration dialog box, you can configure the user interface of the Lionbridge App. Specifically, you can modify the following aspects of the PO Reference field, which is displayed in the Translation Job tab of the New Translation dialog box and in the Send Out Queued Items dialog box:
- the label of the PO Reference field
- configure this field to be either a dropdown list, with pre-configured entries, or a freeform text box
- If you configure this field to be a dropdown list, you can specify the pre-configured entries available for selection
To configure the user interface:
-
In the Site Administration menu on the left, ensure that My Site is selected, so that the My Site page is open. This is the default selection when you log into CloudBroker as a site administrator. For detailed information about this page, see Viewing Lionbridge App Information and Usage Data.
-
Click Configure Site.
The Site Configuration dialog box opens. The Site Name field at the top of the dialog box displays the name of your company’s site.
- Click the UI tab.
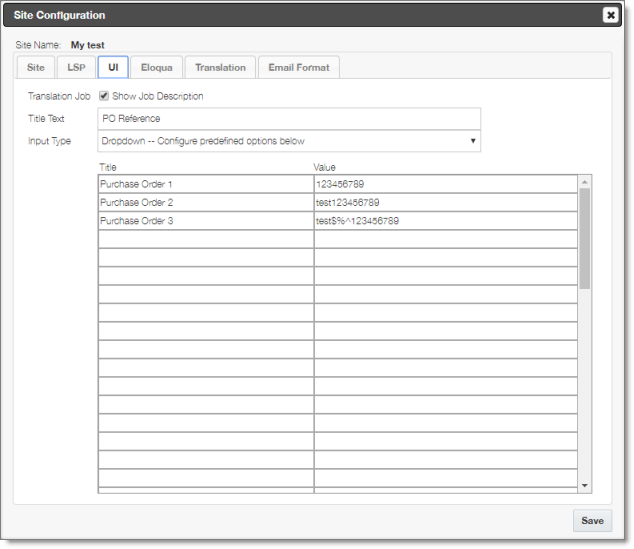
- Optional. To hide the Job Description field when sending out content for translation, you can clear the Show Job Descriptioncheck box. By default, this check box is selected.
Tip: You may want to hide the Job Description field if your translation provider is Lionbridge Freeway, which instead uses the Special Instruction field for this purpose.
-
In the Title Text field, you can specify an alternative label for the PO Reference field, which is displayed in the Translation Job tab of the New Translation dialog box and in the Send Out Queued Items dialog box. Enter your custom label for this field here.
-
In the Input Type dropdown list, select one of the following options:
- Input: This field will be displayed as a freeform text box. This is the default value.
- Dropdown – Configure predefined options below: This field will be displayed as a dropdown list, with pre-configured entries. You specify those entries In the next step.
-
If in the previous step you selected Dropdown – Configure predefined options below as the Input Type, then in the table you specify a title-value pair for each entry that will be available for selection:
- The Title is displayed in the dropdown list and is available for selection.
- The Value is the corresponding input, such as the actual purchase order number.
-
Click Save.