2 minute read
To enable Lionbridge integration, you add the Lionbridge App as a LaunchPoint Service in Marketo.
For information about LaunchPoint services, refer to the Marketo Product Docs, available at https://docs.marketo.com.
To add the Lionbridge App as a LaunchPoint Service in Marketo:
- In Marketo, go to the Admin area and select LaunchPoint.
The Installed Services tab opens.
- Click New.
The New Service dialog box opens.
- In the Service dropdown list, select Custom.
The dialog box expands.
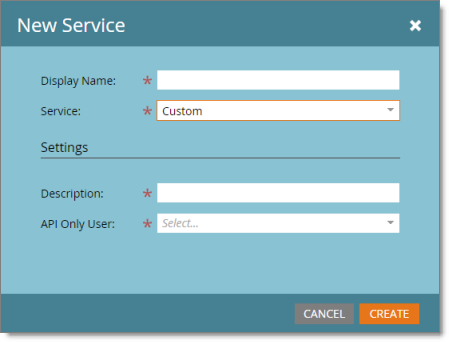
- Enter the following information about the LaunchPoint Service you are creating:
| Field | Description |
|---|---|
| Display Name | The name of the LaunchPoint Service that will be displayed to your company’s admin users in Marketo. |
| Service | Select Custom from the dropdown list. |
| Description | A description of the API Only User, described below. Note: Displayed only when Custom is selected in the Service dropdown list, described above. |
| API Only User | In the dropdown list, select the email address of a Marketo user that has permission to access all assets in Marketo. Note: Displayed only when Custom is selected in the Service dropdown list, described above. |
- Click Create.
The Installed Services tab refreshes.
- In the Installed Services tab, click View Details beside the LaunchPoint Service you just created.
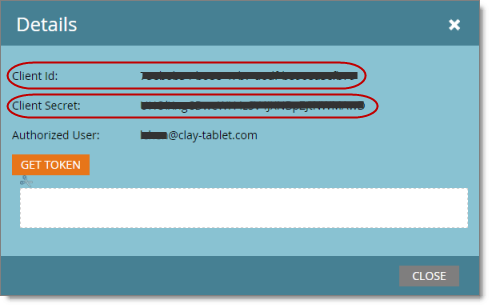
The Details dialog box opens.
-
Record the values in the Client ID and Client Secret fields. You must send these values to the Lionbridge Connector Team so that it can set up your site in CloudBroker.
-
Click Close.
-
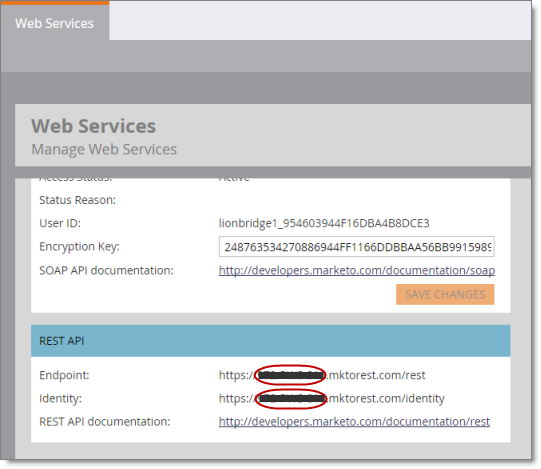
In the Admin area, select Web Services, and scroll down to the REST API section of the Web Services tab.
-
Identify the Marketo instance ID. This is the string between https:// and .mktorest.com… in the Endpoint and Identity fields.
-
Record the Marketo instance ID. You must send it to the Lionbridge Connector Team so that it can set up your site in CloudBroker.