Updating Metadata of Multiple Digital Assets
4 minute read
You use the DAM Metadata Update tab of the Globalization Tool to update the metadata of multiple digital assets that you highlight in the list in the Globalization Tool, including multiple language copies of those digital assets.
To update metadata of multiple digital assets:
- In the Globalization Tool, display and highlight the digital assets for which you want to update the metadata. For detailed instructions, see Performing Actions on Multiple Pages and Digital Assets.
- To highlight a digital asset, click in the corresponding row.
Note: Do not click the actual path in the Path column, because that is a link to the digital asset.
- To highlight multiple adjacent digital assets, press and hold the Shift key.
- To highlight multiple non-adjacent digital assets, press and hold the Ctrl key.
- To highlight all the digital assets in the list, click Highlight All.
- To remove the highlight of all the digital assets in the list, click Remove Highlighted.
- To update the numbers of selected digital assets, highlighted digital assets, and total digital assets at the top-left corner of the list, click Re-Count.
- The number after the check box displays the number of selected digital assets.
- The number after the highlight displays the number of highlighted digital assets.
- The number after the slash ( / ) displays the total number of digital assets.
For example:

Important: Ensure that you highlight the pages in the list, instead of selecting the check boxes.
- In the bottom of the Globalization Tool, click the DAM Metadata Update tab.
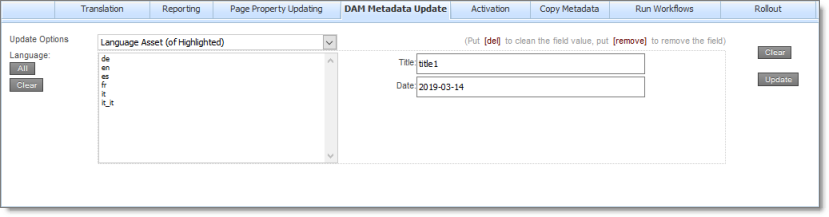
- In the Update Options dropdown list, select one of the following:
- Highlighted Asset: The Connector will update the metadata of the highlighted digital assets.
- Language Asset(of Highlighted): The Connector will update the metadata of the highlighted digital assets in the languages selected in the Language section. All target languages defined for your team profile are displayed in this list.
Note: Languages that are defined only as source languages for your team profile are not displayed here.
- Highlighted Asset and Language Asset: The Connector will update the metadata for highlighted digital assets and in the languages selected in the Language section. All source and target languages defined for your team profile are displayed in this list.
- In the Language section, select the language copies of the highlighted assets that will have updated metadata. This is relevant only if Language Asset (of Highlighted) or Highlighted Asset and Language Asset is selected in the Update Options dropdown list, as described in the previous step.
- To select multiple adjacent languages, press and hold the Shift key.
- To select multiple non-adjacent languages, press and hold the Ctrl key.
- To select all languages, click All.
- To clear all selected languages, click Clear.
- In the right side of the tab, you specify the metadata fields to update and their new values. These fields are defined in the DAM Metadata Configuration section of the Advanced Settings page. For detailed instructions, refer to the Lionbridge Connector for Adobe Experience Manager Installation and Configuration Guide.
- To remove a value from a metadata field, type [del] in that field.
- To remove a metadata field, type [remove] in that field.
- To clear all values, including those in the Language section, click Clear.
- Click Update.
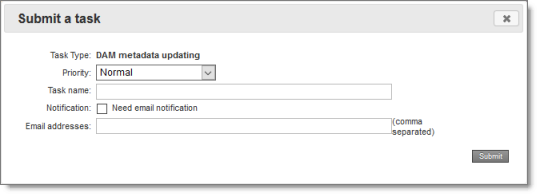
The Submit a new task dialog box opens.
DAM metadata updating will be displayed as a task on the Backend Tasks page.
- Define the parameters for this task:
| Field | Description |
|---|---|
| Priority | The priority level for this task. This is one of the following: * Normal: The Connector executes this task with normal priority. * Urgent: The Connector executes this task before executing tasks with Normal priority. * Wait for approval: This task must be approved before the Connector executes it. |
| Task Name | The name of the task, as it will be displayed on the Backend Tasks page. |
| Notification | To receive an email notification when the task is executed, select the Need email notification check box. |
| Email addresses | If you selected the Need email notification check box, described above, enter the email addresses that will receive a notification when the task is executed. |
- Click Submit.
A message box states that the task has been saved.
- Click OK to close the message box.
You can view your task on the Backend Tasks page, which you open by clicking Tasks in the Lionbridge Connector rail. If the task requires approval before the report is generated, you can approve it there. For detailed instructions, see Managing Tasks and Accessing Reports.