Adding Custom Connector Languages and Codes
2 minute read
The Connector SDK includes a list of pre-defined languages and language codes. If your company wants to use an additional language that does not have a corresponding Connector language and code, then you can create a custom Connector language and language code support.
However, your company will be sending content to a translation management system (TMS) that does not support your new language code. Therefore, you must contact both Lionbridge Connector Support and the translation provider so that they can map your language codes to those supported by the TMS.
Recommendation: Use standard Connector language codes. For a list and description of Connector language codes, see Appendix: Language Codes.
-
To add a custom language, do one of the following:
- In the Touch-Optimized UI of Adobe Experience Manager, click Tools in the Adobe Experience Manager rail. Then, in the Navigation page, click CRXDE Lite.
- In the Classic UI of Adobe Experience Manager, click CRXDE Lite in the right pane.
- In your Web browser, navigate to /crx/de/index.jsp on your Adobe Experience Manager instance.
CRXDE Lite opens.
-
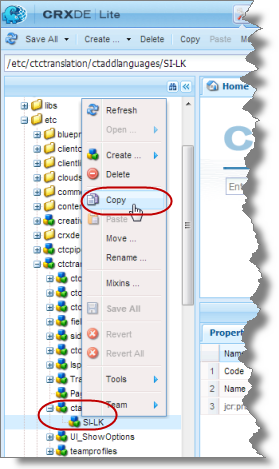
In the navigation pane on the left, navigate to /etc/ctctranslation/ctaddlanguages.
-
Select the sample language node, and copy and paste it as a new node.
- Rename the new node, and change the values of the Code and Name properties.
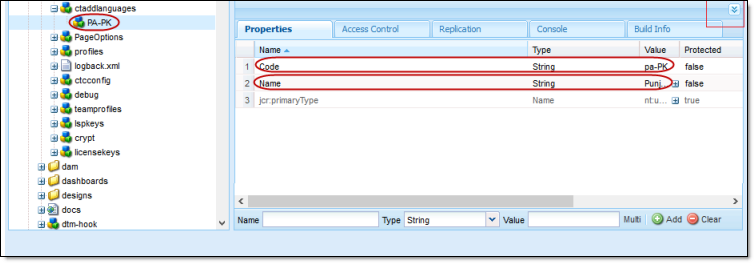
- In the CRXDE Lite Menu, click Save All.
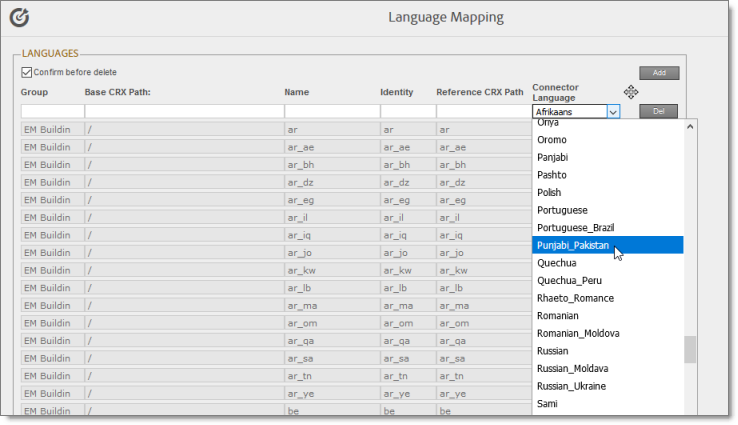
The new language code is now available for selection in the Language Mapping page, which is described on Configuring Connector Languages.