Configuring Custom Content Types
2 minute read
When you send content for translation using the Bulk Translation wizard, the Translation Queue, or Sidekick you can use the content type to filter the content you want to send.
Note: Specifying the content type in Sidekick is available only when working with the Sidekick wizard user interfaces.
The Connector can also configure routing rules to send content of each type to a different translation provider.
By default, the Connector includes three content types, which have the following default labels:
- Marketing
- Technical
- Legal
You can change these labels to reflect your company’s needs. For example, you can send all your marketing content to your translation provider, and all your user-generated content to a machine translation service. In the Content API Platform, the Connector can configure content rules based on content types as follows:
- You can send different content types to different translation providers.
- You can send different content types to different TMSs (translation management systems).
- You can send different content types to different processing profiles within a single TMS instance.
Note: Please contact Lionbridge Connector Support before proceeding. For details, see How to Contact Lionbridge Connector Support.
-
Do one of the following to open CRXDE Lite, where you can configure custom content types:
- In the Touch-Optimized UI of Adobe Experience Manager, click Tools in the Adobe Experience Manager rail. Then, in the Navigation page, click CRXDE Lite.
- In the Classic UI of Adobe Experience Manager, click CRXDE Lite in the right pane.
- In your Web browser, navigate to /crx/de/index.jsp on your Adobe Experience Manager instance.
CRXDE Lite opens.
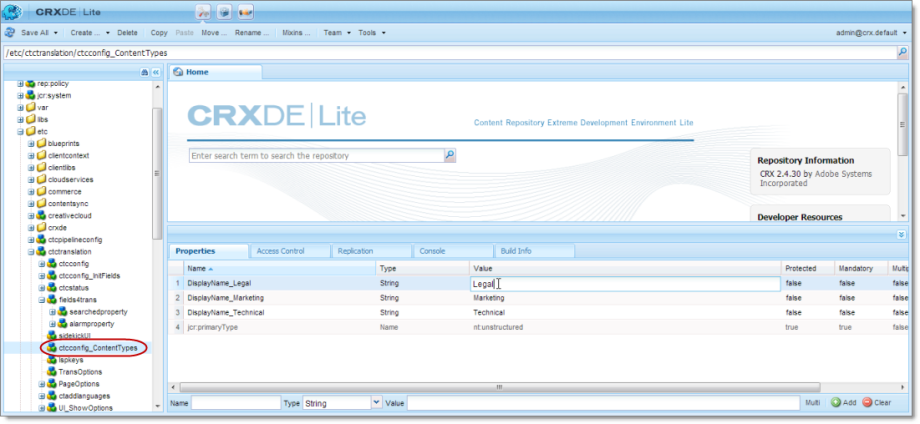
- In the navigation pane on the left, navigate to /etc/ctctranslation/ctcconfig_ContentTypes.
-
In the Properties tab in the Home tab, double-click in the Value column of the content-type label to change, and type the new label.
-
Repeat the previous step for each content-type label you want to change.
-
In the CRXDE Lite Menu, click Save All.