Configuring which Components and Properties to Send Out for Translation
6 minute read
The content of an Adobe Experience Manager page is created from a collection of page components. A component has different properties, which are types of fields. You must configure which components and properties the Connector can send out for translation.
Note: This is required when sending out pages and Experience Fragments for translation. This is not required when sending out adaptive forms, Content Fragments, i18n dictionaries, and tags for translation.
To configure which components and properties the Connector sends out for translation:
- Click Admin Tools > Component Mapping in the Lionbridge Connector rail to open the Component Mapping page. For information on opening the Lionbridge Connector rail, see Configuring the Connector.

For information on using this page to subscribe to email notifications when new components are added, see Subscribing to Email Notifications about New Fields and Components.
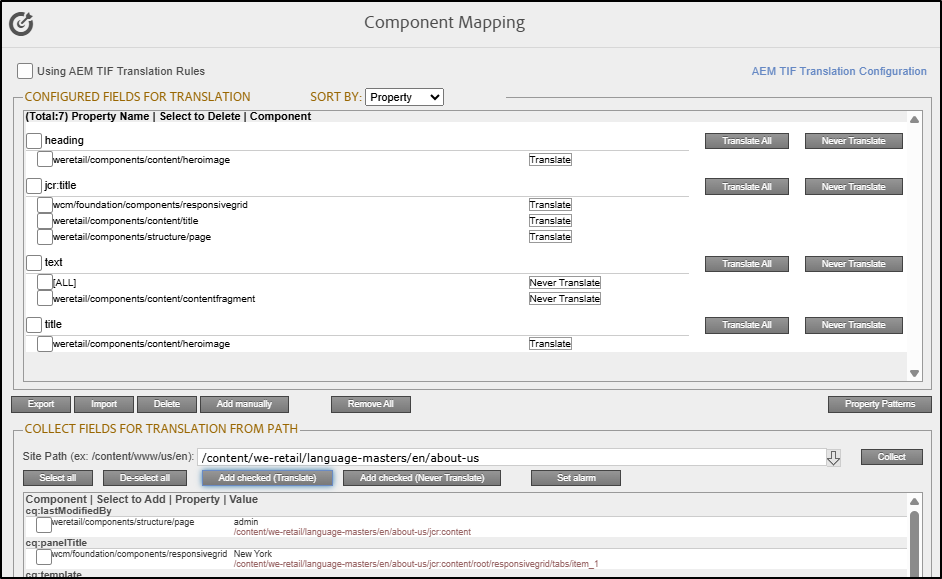
The Configured Fields for Translation section at the top of the page displays all the components and properties that are currently configured for the Connector to send out for translation.
-
Optional. You view a list organized either by property, or by the component.
-
To view the list organized by property, in the Sort By field, select Property. This is the default setting.
-
To view the list organized by component, in the Sort By field, select Component.
-
-
Optional. You can instruct the Connector to collect all properties that are in a specific component for translation. Similarly, you can instruct the Connector to collect all components that have a specific property for translation. You can also remove any component or property from the list, so that the Connector does not collect it to send for translation.
- If you are viewing the list organized by property, then the properties are displayed in alphabetical order. Each component that has this property is displayed underneath it. The components are listed alphabetically by path.
- To instruct the Connector to send all components with a specific property for translation, click the corresponding Set for all components button. The list under the property updates, and the Connector displays [ALL] instead of a list of all components.
- If you are viewing the list organized by property, then the properties are displayed in alphabetical order. Each component that has this property is displayed underneath it. The components are listed alphabetically by path.
Note: When selecting components to instruct the Connector to send digital asset properties for translation, click the corresponding Set for all components button, so that the Connector displays [ALL] instead of a list of all components. Additional steps are required to configure translation settings for digital assets. For details, see Configuring Translation Settings for Digital Assets.
- To remove a component from the list for a property, select the corresponding check box and click Delete. This prevents the Connector from sending out for translation this property in this component.
-
If you are viewing the list organized by component, then the components are displayed in alphabetical order. Each property in a component is displayed underneath it. If there are any properties displayed in all components, these are at the top of the list, under [ALL].
-
To remove a component from the list, so that the Connector does not send it out for translation, select the corresponding check box and click Delete.
-
To remove a property under a component from the list, so that the Connector does not send out that property for translation when it is in that component, select the corresponding check box and click Delete.
-
-
Optional. To remove the mapping for all configured components, click Remove All.
-
Optional. You can export as an XML file the list of fields that the Connector sends out for translation. Click Export at the bottom of this section. The Connector downloads the file, fields4trans.xml.
-
Optional. You can import an XML or a CSV file:
-
You can import a previously exported XML file that is in the same format as fields4trans.xml, described above. This is useful for restoring backed-up properties.
-
You can import a CSV file with comma-separated property names. The Connector will add the properties in this file to all components.
-
Note: The Connector recognizes both ComponentPath and PropertyName as headers and not as actual data.
To import a file:
a. Click Import at the bottom of this section.
The Select a file to upload dialog box opens.
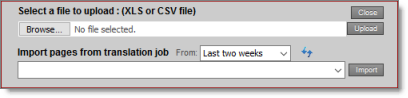
b. Click Choose File.
c. In the browser dialog box that opens, navigate to the XLS or CSV file to import, select it, and click Open, or similar, to close the browser dialog box.
The Select a file to upload dialog box displays the path of the file you selected.
d. Click Upload to upload the file.
The Connector imports the file and updates the configured properties and components.
- Optional. To add a string to a property name to instruct the Connector either to send that property for translation or to avoid sending that property for translation, click Property Patterns.

The Patterns for property names subsection is displayed. Add tags to configure one or more of the settings below.
Note: The tags are not case sensitive.
| Setting | Description |
|---|---|
| Prefix of property name indicates translation needed | The string at the beginning of a property name indicating that translation is required. |
| Including in property name indicates translation needed | The string in the middle of a property name indicating that translation is required. |
| Suffix of property name indicates translation needed | The string at the end of a property name indicating that translation is required. |
| Prefix of property name indicates no translation needed | The string at the beginning of a property name indicating that translation is not required. |
| Including in property name indicates no translation needed | The string in the middle of a property name indicating that translation is not required. |
| Suffix of property name indicates no translation needed | The string at the end of a property name indicating that translation is not required. |
-
Optional. In the Collect Fields for Translation from Path section, you can add additional properties to the list that the Connector can send out for translation.
a. In the Site path field, specify the highest-level folder that contains the component with the properties you want to include.
-
Click the arrow at the end of the field
 , browse to the folder, and click Select.
 -
Enter the CRX path of the folder in the following format: /content/www/us/en.
b. Click Collect.
The Connector searches all components and finds the string-type properties (fields) for all items. When it is done, the Connector displays the lists of properties in the specified folder in the Collected Possible Property Fields for Translation list. Under each property, the Connector displays the path of the component where it is located. To the right, the Connector displays the sample value of the string and underneath it, the path of origin of the sample value.

c. Select the check boxes for all the properties you want the Connector to send out for translation.
d. Click Add checked (Translate).
-
Note: If you want to add components that you do not want translated then click the Add checked (Never Translate) button.
These property fields are now displayed in the Configured Fields for Translation section at the top of the page.
Note: You can change a property field to be translated or to not be translated by using the Translate All or Never Translate buttons.
In the Collected Possible Property Fields for Translation section, you can also perform the following actions:
- To clear all selected check boxes, click De-select all.
- To select all check boxes, click Select all.
- To subscribe to email notifications when new components are added to your site, click Set alarm. For details, see Subscribing to Email Notifications about New Fields and Components.